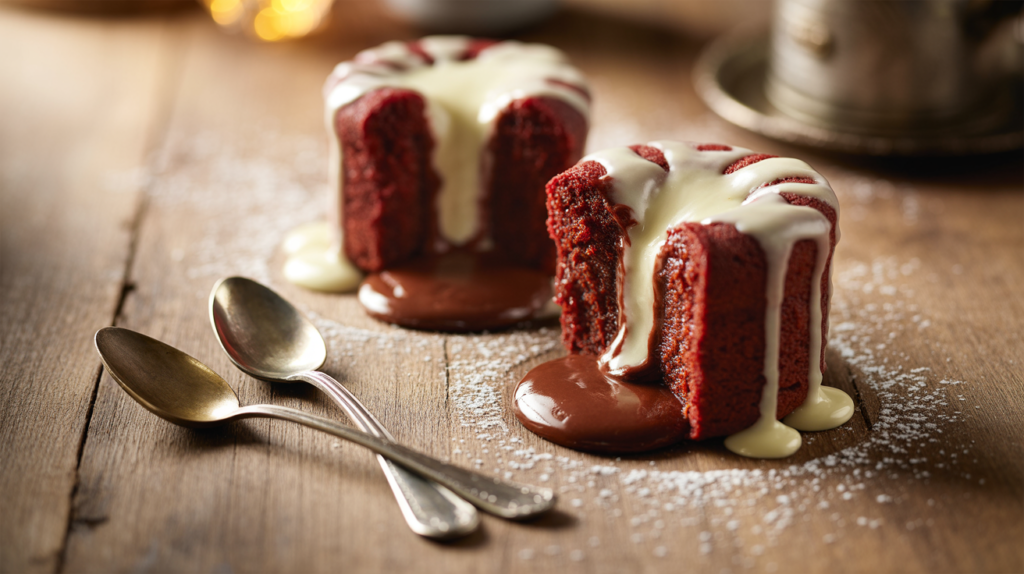
Red Velvet Mug Cake for Two Moist: The Secret to a Gooey, Perfect Center
You crave red velvet cake—that specific combination of cocoa, tang, and velvety texture. You try a mug cake recipe, full of hope. But what comes out of the microwave is dry, crumbly, or worse, tough and rubbery. It tastes like a sad, red sponge. You’re left wondering: is it even possible to get a truly moist, decadent mug cake, or is it just a myth?
What if the problem wasn’t the concept, but the recipe?
It absolutely is possible. We’ve cracked the code. This recipe for a Red Velvet Mug Cake for Two Moist is engineered for one thing: an irresistibly soft, tender, and gooey crumb that rivals a bakery cake. Forget everything you know about disappointing microwave desserts. By understanding the simple science of moisture, we can transform five minutes and a handful of ingredients into a shareable moment of pure, red velvet bliss.
The 3 Secrets to a Moist Mug Cake (Why This Recipe Works)
Most mug cake failures come down to three common issues. Here’s how we solve them:
- The Fat-to-Flour Ratio: Many recipes are flour-heavy, creating a dry, bread-like texture. Our recipe uses a higher proportion of fat (oil/butter) and liquid to coat the flour proteins and ensure tenderness.
- The Acidic Reactant: The classic red velvet tang isn’t just for flavor. The acid from vinegar (or buttermilk) reacts with baking soda/powder, creating bubbles that make the cake rise and become light, not dense.
- The “Underbaked” Sweet Spot: In a microwave, carryover cooking is huge. Pulling the cake out when it looks just set, but the very center is still a tiny bit underdone, guarantees a moist result as it finishes cooking on your counter.
Your Guaranteed-Moist Ingredient List
Precision matters for a perfect texture. Here’s your shopping list:
For the Cakes:
- 5 tablespoons all-purpose flour (spooned & leveled, not packed!)
- 4 tablespoons granulated sugar
- 1 tablespoon unsweetened cocoa powder
- ¼ teaspoon baking powder
- ⅛ teaspoon baking soda
- Tiny pinch of salt
- 3 tablespoons milk, at room temperature
- 3 tablespoons neutral oil (vegetable, canola) or melted butter
- ½ teaspoon pure vanilla extract
- ½ teaspoon white vinegar
- 1 ½ teaspoons red gel food coloring (liquid works, but gel is superior for color)
For the “Wet” Center Option (Highly Recommended!):
- 2 squares of dark chocolate or 4-5 chocolate chips per mug
For the Cream Cheese Glaze:
- 2 tablespoons cream cheese, softened
- 1 tablespoon powdered sugar
- 1-2 teaspoons milk
- ¼ teaspoon vanilla extract
The Foolproof Method: Step-by-Step to Moisture Heaven
Follow these steps closely for a guaranteed perfect texture.
Step 1: Select & Prep Your Mugs
Choose two wide, microwave-safe ceramic mugs (10-12 oz capacity). Lightly grease the inside with butter or oil. This prevents sticking and helps create a tender edge.
Step 2: Whisk Dry Ingredients Thoroughly
In a small bowl, whisk together the flour, sugar, cocoa powder, baking powder, baking soda, and salt. A thorough whisk here prevents bitter clumps of baking soda and ensures even leavening.
Step 3: Combine Wet Ingredients Separately
In another small bowl or measuring cup, whisk together the milk, oil, vanilla, vinegar, and red food coloring until the mixture is uniform in color.
Step 4: Gently Combine, Don’t Overmix
Pour the wet ingredients into the dry. Use a fork or small whisk to stir just until combined. A few small lumps are okay! Overmixing develops gluten, leading to a tough cake. The batter should be smooth and pourable.
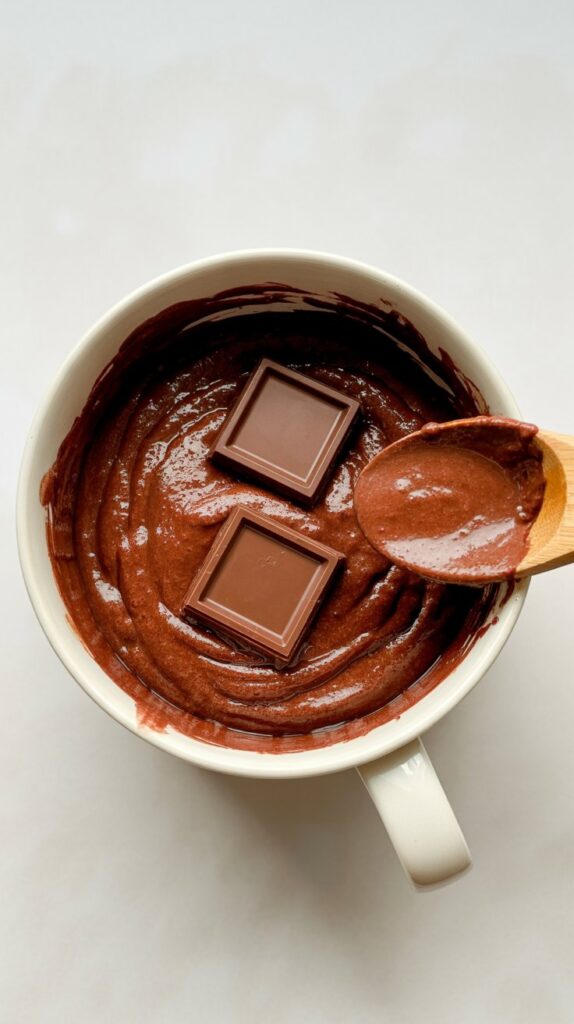
Step 5: The Secret Chocolate Pocket
Divide half the batter between the two mugs. Place the chocolate squares or chips in the center of each. Top with the remaining batter, covering the chocolate completely. This creates an irresistible molten center.
Step 6: Microwave with Care
Microwave the mugs one at a time on high power. Start with 50 seconds. The cake is done when the top looks matte and set around the edges, but the very center may still look slightly wet. A toothpick inserted near the edge should come out clean; in the center, it will have wet crumbs. This is perfect.
Pro-Tip: Microwave wattages vary. If yours is 1200W or higher, start with 45 seconds. It’s always better to undercook and add 10 seconds than to overcook.
[A good kitchen timer is essential for nailing that perfect, moist cook time.]
Step 7: Make the Glaze & Rest
While the cakes cool for 60 seconds (this is mandatory resting time!), make the glaze. Mash the softened cream cheese with powdered sugar, then whisk in milk and vanilla until drizzle-able.
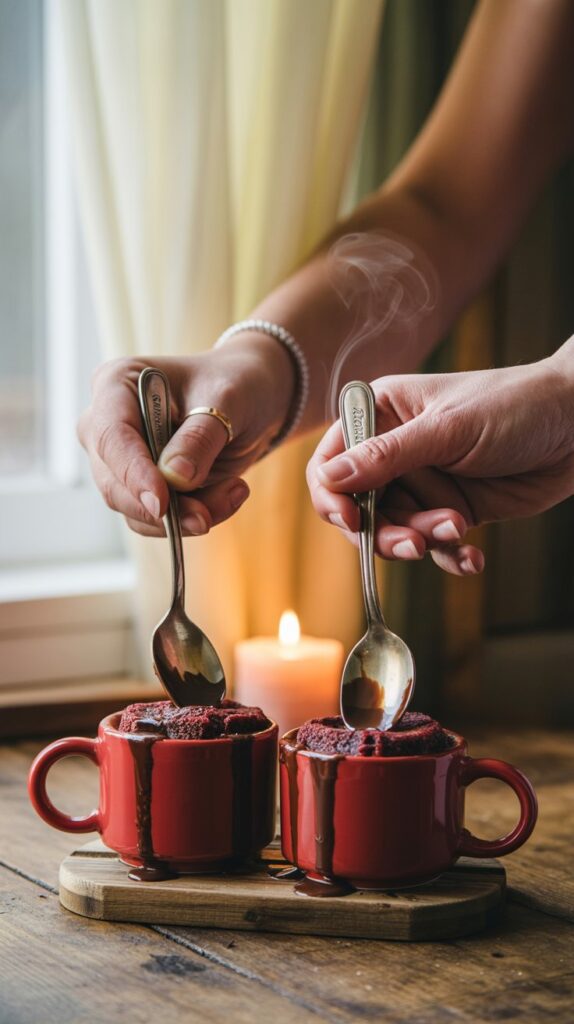
Step 8: Serve Immediately!
Drizzle the glaze over the warm cakes. The heat will make it melt slightly into the crumb. Serve right away with two spoons and dive into that moist, chocolatey center.
The Science of “Moist”: Why Each Step Matters
- Oil vs. Butter: Oil creates a more moist crumb than butter because it’s 100% fat, while butter contains water. We use oil for maximum moisture insurance.
- Vinegar & Baking Soda: This combo creates an instant chemical reaction, producing carbon dioxide bubbles that give the cake a lighter, more tender structure from the very first second in the microwave.
- The Resting Period: Letting the cake sit for 60 seconds allows the intense heat to distribute evenly, finishing the cook gently and letting the structure set without drying out.
Customize Your Perfect Moist Mug Cake
- Buttermilk Version: Replace the milk with buttermilk and omit the vinegar. The buttermilk provides the needed acid.
- Dairy-Free: Use your favorite plant-based milk and vegan cream cheese.
- Add Crunch: Sprinkle a few chopped pecans on top of the batter before microwowing.
- Extra Vanilla: Add ¼ teaspoon of vanilla bean paste to the batter for those beautiful speckles and deep flavor.
🔥 Recommended Baking & Kitchen Essentials
Here are a few of my favorite tools that make baking (and biscuit-making!) easier, faster, and way more fun.
1. BLACK+DECKER Crisp ’N Bake Air Fry Toaster Oven
Crisps, toasts, bakes, and air fries — all in one compact countertop oven. Perfect for quick biscuits, snacks, and weeknight cooking.
👉Check it out on Amazon2. CHEFMAN Digital Air Fryer + Rotisserie (XL 10L)
A true all-in-one appliance — air fry, roast, bake, dehydrate, and rotisserie family-size meals with ease.
👉See today’s price on Amazon3. 5-Piece Pastry & Biscuit Cutter Set
Everything you need for perfect biscuits: stainless-steel cutters, dough scraper, pastry blender, and a baking mat — beginner friendly and super durable.
👉Grab it on Amazon4. Nordic Ware Naturals Aluminum Half Sheet Pans (2-Pack)
Professional-quality sheet pans that brown beautifully, never warp, and last a lifetime — essential for any baking lover.
👉View it on Amazon5. Amazon Basics Nonstick 12-Cup Muffin Pans (Set of 2)
Reliable nonstick pans for muffins, cupcakes, egg bites, and more — even heating, easy cleanup, and great value.
👉Get it on Amazon6. Stand Mixer (5–6 Quart)
Makes mixing doughs and batters effortless during holiday baking.
👉Grab it here on AmazonDisclosure:
As an Amazon Associate, I earn from qualifying purchases. This means if you click on one of the product links and make a purchase, I may receive a small commission at no extra cost to you. I only recommend products I personally use and love.
Troubleshooting: Your Path to Mug Cake Perfection
Q: My cake exploded over the rim!
A: Your mug is too small or was overfilled. Always use a 10-12 oz mug and fill it only halfway with batter to allow for rise.
Q: It’s still dry. What did I do wrong?
A: The most likely culprit is overcooking. Next time, reduce the microwave time by 10-15 seconds. Also, ensure you’re measuring your flour correctly (spoon into the cup and level, don’t scoop).
Q: Can I make this in the oven?
A: For a similar result, bake in two 6-oz ramekins at 350°F (175°C) for 12-15 minutes. The center should still be slightly soft.
Q: The center is raw and batter-like.
A: Simply microwave in additional 10-second bursts until the top is set. Remember, a little gooeyness is the goal, but it shouldn’t be liquid.
Q: How can I make just one cake?
A: Halve all the ingredient amounts exactly. Use one mug and microwave for 40-55 seconds.
Conclusion: Your Search for the Perfect Bite is Over
This Red Velvet Mug Cake for Two Moist recipe is the solution to the dry, disappointing mug cakes of the past. By focusing on the precise balance of fat, acid, and a carefully monitored cook time, you can consistently achieve a dessert that is lush, tender, and deeply satisfying. It turns a simple craving into a shared experience of warmth and indulgence, proving that the best desserts don’t need hours—just a few minutes and the right know-how.