How to Make 3 Ingredient Banana Pancakes: Your Lazy Sunday Breakfast Savior
Let’s be honest. The idea of making pancakes from scratch on a lazy morning is lovely, but who actually wants to pull out a dozen ingredients and a sifter? Not me. I’d rather be sipping my coffee. If you’ve ever stared at a sad, overripe banana and thought, “There has to be a better fate than the trash,” I’m here to tell you there is. A glorious, delicious, and stupidly simple one.
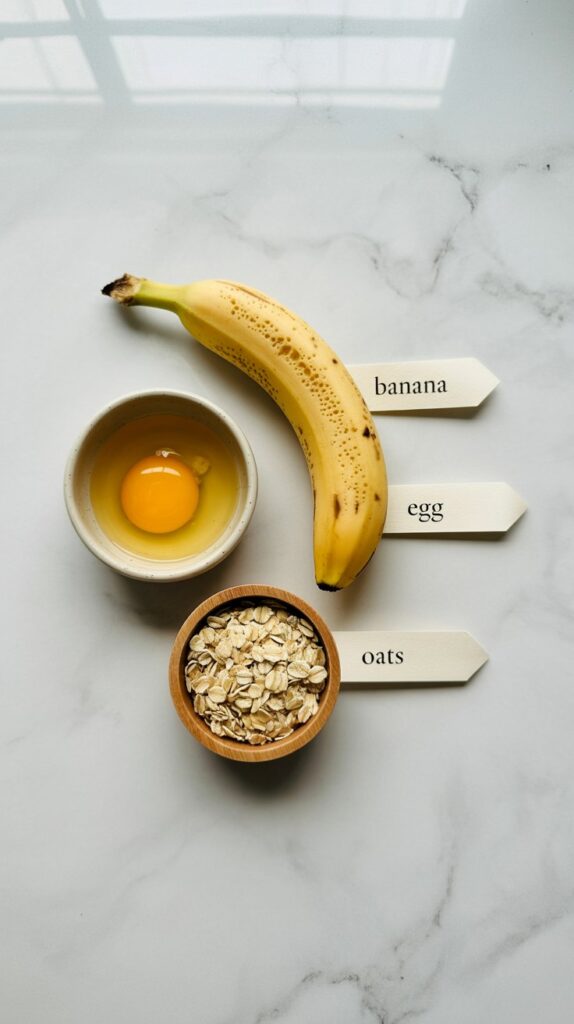
I’m talking about 3 ingredient banana pancakes. No baking powder, no milk, no complicated steps. Just three things you definitely have, right now. This isn’t just a recipe; it’s a lifesaver for lazy cooks, a godsend for busy parents, and the perfect way to feel fancy without any of the effort. Ready to have your mind blown?
Why This Recipe Actually Works (The Magic Trio)
You’re probably skeptical. I get it. How can three things make something that actually resembles a pancake? It feels like kitchen witchcraft. But the beauty is in the chemistry of this specific trio. Each ingredient has a very important job.
- The Ripe Banana: This is your sweetener and your moisture. You need a banana that looks like it’s given up on life—all spotty and soft. These bananas mash easier and pack a much sweeter, more intense flavor. They basically create the pancake’s body.
- The Egg: This is your binder and your rise. The egg provides structure, holding everything together so you get a pancake and not banana scrambles. It also gives the pancakes a little lift and a ton of protein, making them surprisingly satisfying.
- The Flour/Oatmeal: This is your structural hero. Just a couple of tablespoons gives the batter the necessary “oomph” to hold its shape in the pan. You have options here, and each one gives a slightly different result.
The Great Flour Debate: Which One Should You Use?
This is your one big choice, and honestly, you can’t go wrong. I’ve tested both more times than I can count.
- All-Purpose Flour: This gives you the most classic, “pancake-like” texture. It’s neutral in flavor and creates a slightly smoother, more uniform pancake. It’s my go-to when I want that familiar diner-style feel.
- Oatmeal (Rolled Oats or Quick Oats): IMO, this is the health-forward power move. Grind some rolled oats into a quick flour in your blender, or use pre-made oat flour. It gives the pancakes a heartier, denser texture and a lovely, nutty flavor. It also makes these gluten-free, FYI.
Your Foolproof, Step-by-Step Guide
Okay, enough science. Let’s make some pancakes. The whole process takes about 10 minutes, and I’m including cleanup time. Seriously.
What You’ll Need:
- 1 very ripe banana
- 1 large egg
- 2 tablespoons of all-purpose flour OR oat flour
- A fork, a bowl, and a non-stick skillet
- (Optional) A tiny pinch of cinnamon or a drop of vanilla extract, if you’re feeling wild.
Step 1: Become a Mashing Master
Peel that banana and drop it into a medium bowl. Now, take your fork and go to town. You want to mash it until it’s basically a smooth, lump-free puree. A few tiny lumps are okay—this is a rustic, artisanal experience, right?
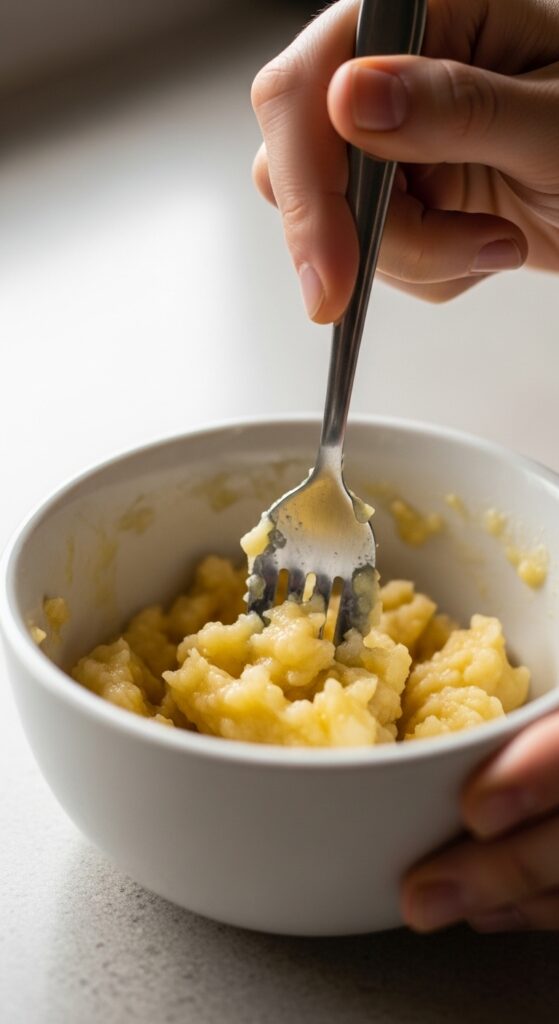
Step 2: The Quick Mix
Crack the egg right into the banana mush and whisk it all together with your fork until it’s fully combined. Now, sprinkle in your two tablespoons of flour or oat flour. Stir it until you can’t see any more dry, white spots. Your batter will be thinner than a traditional pancake batter, but that’s perfect. It’s supposed to be that way!
Step 3: The Art of the Perfect Pancake
This is the only part where you need to pay a little attention. Heat your non-stick skillet or griddle over medium-low heat. This is my golden rule. Low and slow wins the race. If your pan is too hot, the outside will burn before the middle cooks.
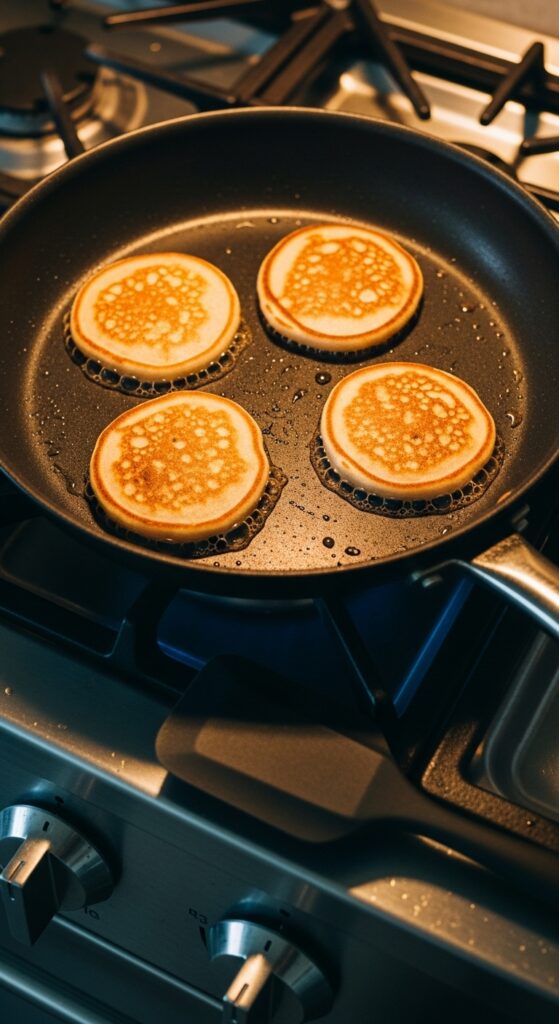
I add the tiniest smear of butter or coconut oil for flavor, but a good non-stick pan might not even need it. Pour about two tablespoons of batter for each pancake. You’re making cute, silver-dollar sized ones. They’re easier to flip and look adorable.
Now, wait for the bubbles. You’ll see little bubbles forming on the surface and the edges will start to look set. This takes about 2-3 minutes. Then, slide your spatula underneath and flip with confidence! Cook for another 1-2 minutes on the other side until golden brown.
Pro-Tips from My Kitchen (Aka, Lessons from My Failures)
I’ve burned a few of these in my day, so you don’t have to. Learn from my mistakes!
- Embrace the Low Heat. Did I mention the low heat? I’m mentioning it again because it’s the number one reason people mess this up. Patience is key. If your first batch burns, just lower the heat and carry on.
- Make Them Mini. Trust me on this. Smaller pancakes are infinitely easier to manage. You get more fluffy edges, and they flip like a dream.
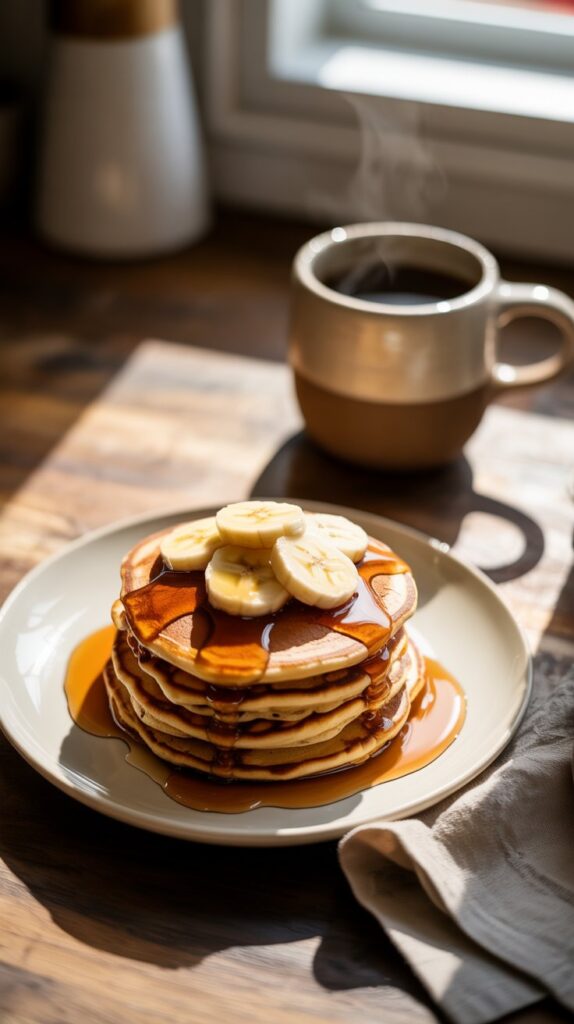
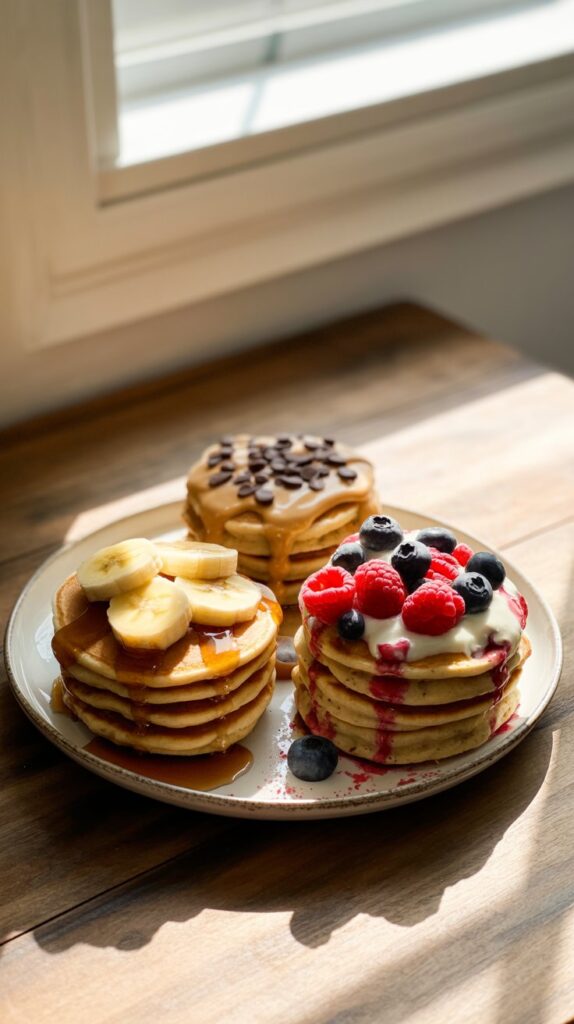
- Get Creative with Toppings. The pancake itself is a blank, banana-y canvas. Go crazy!
- Classic: A drizzle of maple syrup and a few banana slices.
- Decadent: A smear of peanut butter and a handful of chocolate chips.
- Fresh & Zesty: A pile of fresh berries and a dollop of Greek yogurt.
- Don’t Be Afraid of a Do-Over. If your first pancake is a weird shape or breaks a little, who cares? Call it the “chef’s snack” and eat it straight from the pan. The next one will be perfect.
So, what are you waiting for? You have a banana that’s begging for a purpose. This recipe is the ultimate kitchen hack for a quick, delicious, and genuinely satisfying breakfast. It proves that the best things don’t have to be complicated.
Now go forth and conquer your morning. Your perfect, lazy-day pancake is just three ingredients away.