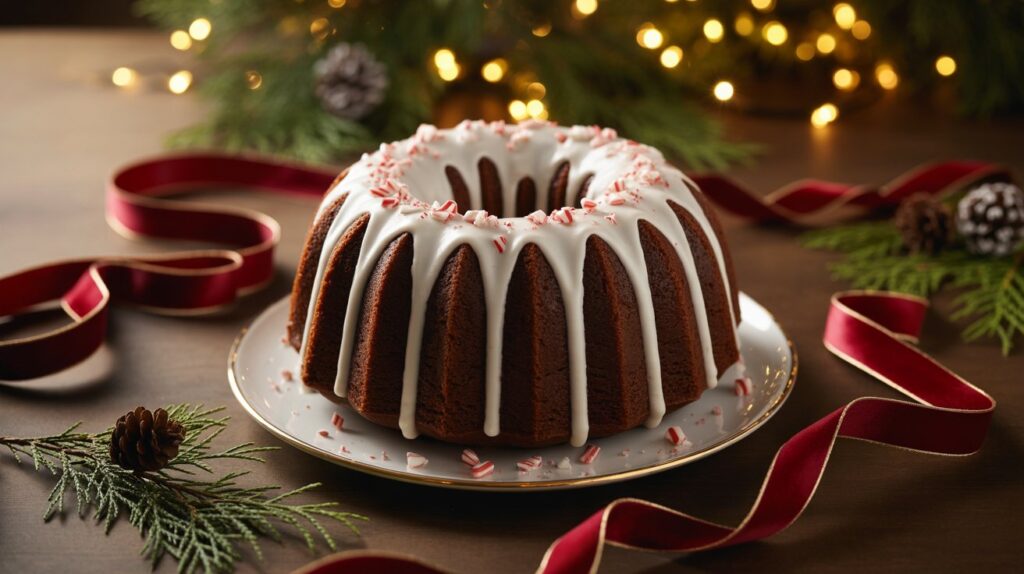
Chocolate Peppermint Bundt Cake: Your New Favorite Holiday Showstopper
You want a dessert that screams “holiday party.” Something beautiful, decadent, and festive that makes people say “wow” when you bring it to the table. But the thought of intricate layer cakes, finicky frosting, and hours of decorating makes you want to hide the mixing bowls. There has to be an easier way to create maximum impact with less stress, right?
There is. It’s called the chocolate peppermint Bundt cake.
This cake is your secret weapon. It combines the deep, rich comfort of chocolate with the bright, festive zing of peppermint in a single, elegant shape. The Bundt pan does the heavy lifting for you, creating a stunning design with zero piping skills required. In this guide, I’ll walk you through a foolproof, moist cake recipe, a simple glossy glaze, and all the pro tips you need to bake, decorate, and present a dessert that’s as joyful to make as it is to eat. Let’s make your holiday baking both beautiful and easy.
Why This Cake is a Holiday Baking Game-Changer
Let’s talk about why this specific cake deserves a spot on your festive table:
- The “Wow” Factor with Minimal Effort: The Bundt pan creates a sculpted, impressive look automatically. A simple glaze and sprinkle of candy make it party-ready.
- Make-Ahead Magic: This cake tastes even better the next day, as the flavors meld. Bake it a day early to free up your schedule.
- Feeds a Crowd: A classic 10-12 cup Bundt cake generously serves 12-16 people, making it perfect for gatherings.
- The Perfect Flavor Pairing: Chocolate and peppermint is the quintessential holiday duo. It’s nostalgic, celebratory, and universally loved.
Gathering Your Ingredients: A Checklist for Success
This recipe uses straightforward ingredients. Here’s your checklist to ensure you have everything.
For the Chocolate Cake:
- 2 cups all-purpose flour
- ¾ cup unsweetened cocoa powder (Dutch-process or natural)
- 2 cups granulated sugar
- 1 ½ teaspoons baking soda
- 1 ½ teaspoons baking powder
- 1 teaspoon salt
- 2 large eggs, at room temperature
- 1 cup whole milk, at room temperature
- ½ cup vegetable oil or melted coconut oil
- 2 teaspoons pure vanilla extract
- 1 cup hot, strong brewed coffee or hot water (enhances chocolate flavor!)
For the Peppermint Swirl & Glaze:
- 1 teaspoon peppermint extract (not mint extract!)
- For the Glaze: 1 ½ cups powdered sugar, 2-3 tablespoons milk or cream, ¼ teaspoon peppermint extract.
- For Decoration: Crushed candy canes or peppermint candies.
Essential Equipment:
- A 10-12 cup Bundt pan. This is non-negotiable.
- A stand mixer or hand mixer (you can mix by hand, but a mixer is easier).
- A fine-mesh sieve for sifting dry ingredients.
- A wire cooling rack.
(The right Bundt pan makes all the difference. A high-quality non-stick pan with a intricate design will give you the cleanest release.)
The Step-by-Step Recipe: Baking a Masterpiece
Follow these stages for a perfectly moist, tall cake with a beautiful crumb.
H2: How to Make Your Chocolate Peppermint Bundt Cake
Step 1: Prep Your Pan (The Most Important Step!).
Do not skip this! Thoroughly grease every nook and cranny of your Bundt pan with baking spray with flour (like Baker’s Joy) or brush with melted butter and dust with cocoa powder. This guarantees a clean release.
Step 2: Combine Dry Ingredients.
In a large bowl, sift together the flour, cocoa powder, sugar, baking soda, baking powder, and salt. Sifting prevents lumps and ensures a light, tender cake. Whisk to combine.
Step 3: Combine Wet Ingredients.
In the bowl of your stand mixer or another large bowl, combine the eggs, milk, oil, and vanilla extract. Mix on medium speed until just combined.
Step 4: Bring It All Together.
With the mixer on low, gradually add the dry ingredients to the wet ingredients. Mix until just a few streaks of flour remain. Important: With the mixer still on low, slowly and carefully pour in the hot coffee. The batter will be thin—this is normal and correct! It will result in an incredibly moist cake.
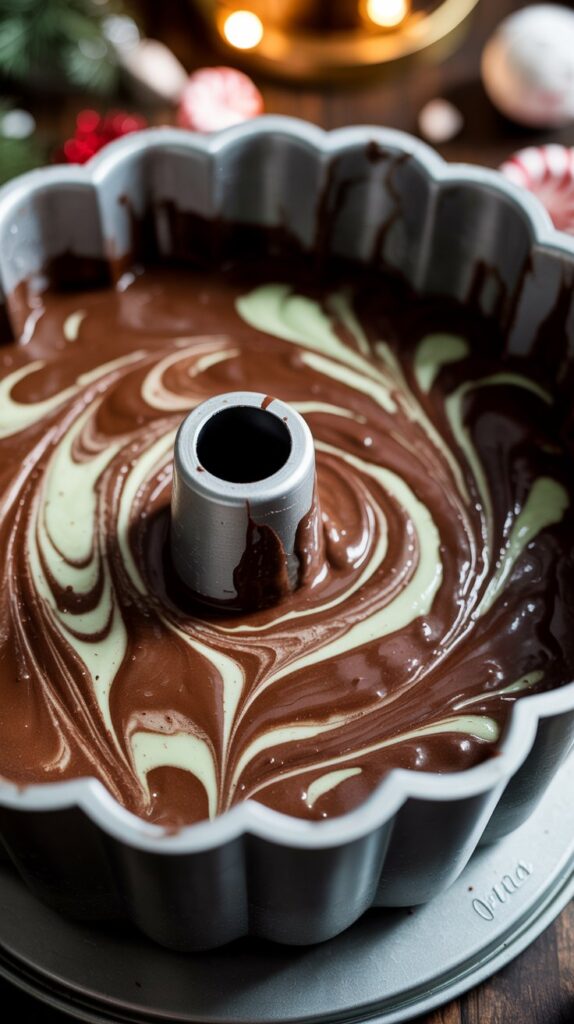
Step 5: Create the Peppermint Swirl.
Pour about ⅓ of the batter into a small bowl. Stir the 1 teaspoon of peppermint extract into this portion.
Step 6: Layer and Swirl.
Pour half of the plain chocolate batter into the prepared pan. Dollop spoonfuls of the peppermint batter over it. Top with the remaining chocolate batter. Use a knife or skewer to gently swirl the layers 4-5 times—don’t overmix!
Step 7: Bake to Perfection.
Bake in a preheated 350°F (175°C) oven for 45-55 minutes. The cake is done when a toothpick inserted into the center comes out with just a few moist crumbs. Do not overbake.
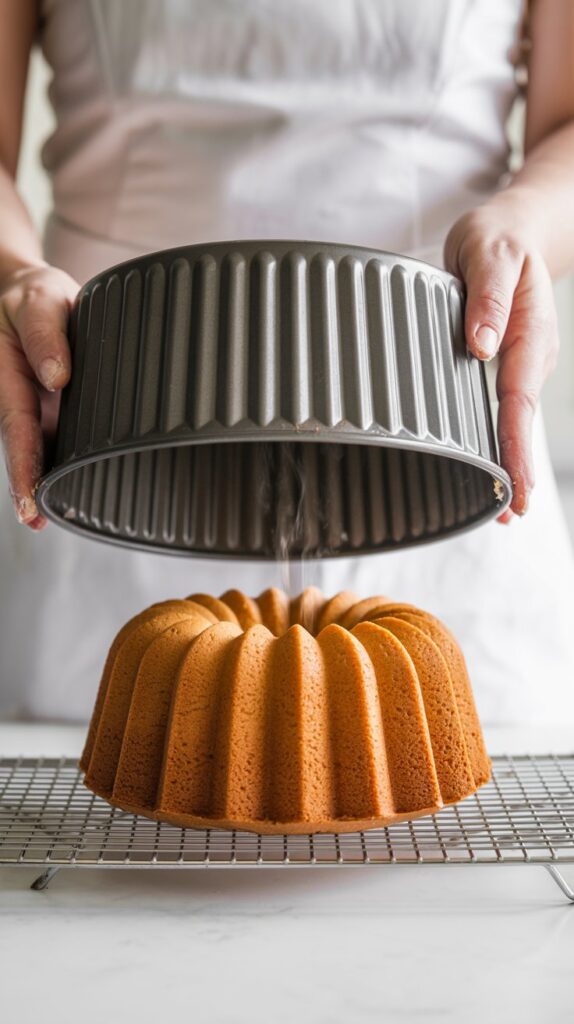
Step 8: The Critical Cool.
Let the cake cool in the pan on a wire rack for 25-30 minutes exactly. This allows it to set. Then, place the rack over the pan and confidently flip it over. The cake should release cleanly. Let it cool completely before glazing.
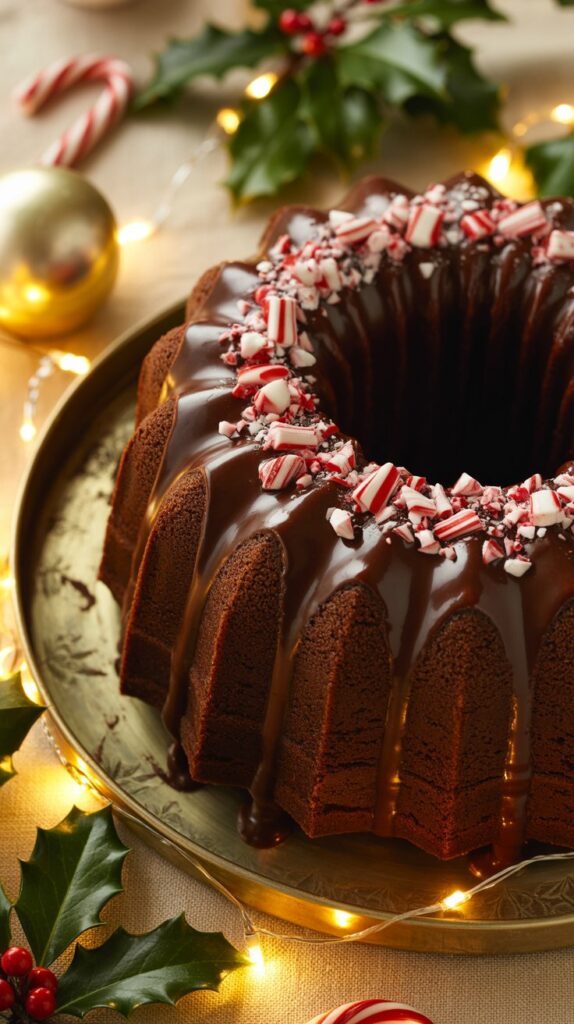
Step 9: Glaze and Decorate.
Whisk the powdered sugar, 2 tablespoons of milk/cream, and peppermint extract for the glaze. Add more liquid 1 teaspoon at a time until it reaches a thick but pourable consistency. Drizzle over the completely cooled cake. Immediately sprinkle with crushed peppermint candy.
Pro-Tip for a Clean Release: After greasing, place your pan in the freezer for 10 minutes. This helps the fat set in the crevices. Then pour in your batter and bake. This trick is a game-changer for intricate pans!
5 Festive Variations to Make It Your Own
Once you master the classic, try these fun twists:
- Peppermint White Chocolate Glaze: Melt ½ cup white chocolate chips with 2 tbsp cream. Drizzle over the powdered sugar glaze.
- Inside-Out Cake: Fold ½ cup of finely crushed candy canes right into the full batter for a speckled interior and extra crunch.
- Mocha Peppermint: Add 1 tablespoon of instant espresso powder to the dry ingredients for a deeper coffee flavor.
- Ganache Cover: Skip the powdered sugar glaze. Pour a silky dark chocolate ganache over the cake for an ultra-rich finish.
- Mini Bundt Cakes: Use a mini Bundt pan. Adjust baking time to 18-22 minutes. Perfect for individual servings!
🔥 Recommended Baking & Kitchen Essentials
Here are a few of my favorite tools that make baking (and biscuit-making!) easier, faster, and way more fun.
1. BLACK+DECKER Crisp ’N Bake Air Fry Toaster Oven
Crisps, toasts, bakes, and air fries — all in one compact countertop oven. Perfect for quick biscuits, snacks, and weeknight cooking.
👉Check it out on Amazon2. CHEFMAN Digital Air Fryer + Rotisserie (XL 10L)
A true all-in-one appliance — air fry, roast, bake, dehydrate, and rotisserie family-size meals with ease.
👉See today’s price on Amazon3. 5-Piece Pastry & Biscuit Cutter Set
Everything you need for perfect biscuits: stainless-steel cutters, dough scraper, pastry blender, and a baking mat — beginner friendly and super durable.
👉Grab it on Amazon4. Nordic Ware Naturals Aluminum Half Sheet Pans (2-Pack)
Professional-quality sheet pans that brown beautifully, never warp, and last a lifetime — essential for any baking lover.
👉View it on Amazon5. Amazon Basics Nonstick 12-Cup Muffin Pans (Set of 2)
Reliable nonstick pans for muffins, cupcakes, egg bites, and more — even heating, easy cleanup, and great value.
👉Get it on Amazon6. Stand Mixer (5–6 Quart)
Makes mixing doughs and batters effortless during holiday baking.
👉Grab it here on AmazonDisclosure:
As an Amazon Associate, I earn from qualifying purchases. This means if you click on one of the product links and make a purchase, I may receive a small commission at no extra cost to you. I only recommend products I personally use and love.
Expert Tips for Bundt Cake Success
- Room Temperature Matters: Eggs and milk incorporate more easily into the batter at room temp, leading to a better rise and texture.
- The Coffee Secret: The hot coffee blooms the cocoa powder, intensifying the chocolate flavor without making the cake taste like coffee. You won’t taste it, I promise!
- Cool Completely Before Glazing: If you glaze a warm cake, the icing will melt and slide right off. Patience is key.
- Storage: Store the glazed cake, loosely covered, at room temperature for up to 3 days. The glaze may soften the candy over time—for the crunchiest topping, add candy just before serving.
Frequently Asked Questions (FAQs)
Q: Can I make this cake without a Bundt pan?
A: Yes, but you’ll lose the signature shape. You can bake it in a 9×13 inch pan or two 8-inch round pans. Adjust baking time (start checking at 30 minutes for layers).
Q: My cake stuck to the pan! How can I fix it?
A: Let it cool a bit longer, then gently loosen edges with a flexible silicone spatula. If pieces stick, carefully patch them on with extra glaze—it’s a delicious “secret.”
Q: Can I use mint extract instead of peppermint?
A: I don’t recommend it. Mint extract is often spearmint, which tastes like toothpaste with chocolate. Pure peppermint extract is the right flavor.
Q: Can I freeze this Bundt cake?
A: Absolutely. Freeze the un-glazed, cooled cake tightly wrapped for up to 2 months. Thaw overnight, then glaze and decorate.
Q: Why is my cake dry?
A: The most common culprit is overbaking. Use a toothpick test and remember the cake continues to cook from residual heat as it cools. Measure your flour correctly (spoon and level, don’t scoop).
Conclusion: Bake a Memory, Not Just a Cake
Creating this chocolate peppermint Bundt cake is about embracing the joy of holiday baking without the stress. You’ve learned that success lies in the simple steps: properly preparing your pan, embracing a thin batter, mastering the swirl, and allowing for a patient cool. The result is a breathtaking dessert that delivers on both flavor and spectacle, proving that impressive doesn’t have to mean complicated.
You now have a reliable, festive recipe that’s sure to become a requested tradition. It’s the perfect centerpiece for your holiday table, a generous gift for a neighbor, or a sweet celebration of the season.