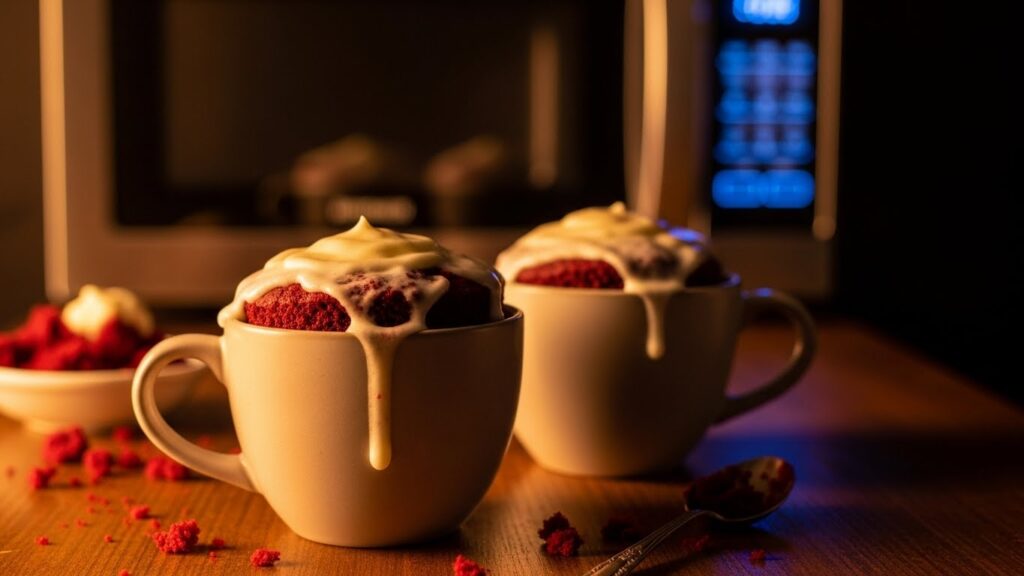
Let’s be honest: you’re not scrolling for a red velvet mug cake recipe at 2 PM on a Tuesday. It’s 10:37 PM. The craving has ambushed you. The idea of a whole cake is laughable, but a single, glorious, personal portion of red velvet? That feels like destiny. And if destiny can be microwaved and ready before the next episode auto-plays, then we are truly living in the future. Grab a mug. Let’s get this magic started.
Why This Recipe is Awesome
This isn’t just a mug cake. This is a craving-crushing, share-or-don’t, minimal-dish-washing life hack. It’s faster than most drive-thrus and feels infinitely more special. It’s idiot-proof—I’ve tested it in a sleep-deprived state and it still worked. You get that iconic red velvet flavor (cocoa, buttermilk tang, vanilla) without the commitment of layers, frosting from scratch, or your stand mixer judging you from the corner. It’s portion control, if your portion is “bliss.”
Ingredients You’ll Need
- 4 Tbsp all-purpose flour (Spoon it lightly into the measuring spoon, don’t scoop and pack it. We’re baking, not building a sandcastle.)
- 3 Tbsp granulated sugar (For the sweet stuff. Not powdered. Granulated.)
- 2 tsp unsweetened cocoa powder (This is non-negotiable. It’s what makes red velvet red velvet and not just red cake.)
- ¼ tsp baking powder (Your tiny leavening hero. Make sure it’s not expired.)
- A tiny pinch of salt (The flavor enhancer. It’s essential, even if it seems silly.)
- 3 Tbsp milk + ½ tsp white vinegar (This is your quick, brilliant “buttermilk” hack. Stir them together and let them sit for 60 seconds. Science!)
- 2 Tbsp neutral oil (Vegetable, canola. It keeps this cake super moist. Melted butter works for a richer taste, but oil is foolproof.)
- ½ tsp vanilla extract (The good stuff. Imitation will make your cake taste like a candle.)
- 1 – 1 ½ tsp red gel food coloring (Gel is best for vibrant color without thinning the batter. Liquid works in a pinch—you might need a few more drops.)
- The Icing on the Cake (Literally): A generous dollop of store-bought cream cheese frosting. Zero shame. Absolute victory.
Step-by-Step Instructions
- Create Your “Buttermilk.” In a small cup, stir together the milk and vinegar. Let it sit while you gather everything else. It will look slightly curdled and weird. Perfect! That’s the tangy magic starting.
- Mix the Dry Team. In a small bowl, whisk together the flour, sugar, cocoa powder, baking powder, and salt. Get out any cocoa lumps. This is your 30-second foundation.
- Build the Batter. To the dry ingredients, add your “buttermilk,” oil, vanilla, and red food coloring. Stir with a fork or small whisk until just combined. A few small lumps are totally fine. Overmixing is the enemy of a tender crumb.
- Prep and Pour. Take two microwave-safe mugs (at least 10 oz capacity). Give each a light spritz of cooking spray or a wipe with oil. Divide the shockingly red batter evenly between them. They should be about half full.
- Microwave with Confidence. Cook one mug at a time for even results. Microwave on high for 60-75 seconds. Start with 60! The cake is done when the top looks set and slightly springy, and a toothpick inserted comes out with a few moist crumbs. It will firm up as it cools.
- The Grand Finale. Let the mugs cool on the counter for 2 minutes (trust me, molten sugar burns are not romantic). Top each warm cake with a glorious spoonful of cream cheese frosting. Watch it melt enticingly into the red crumb. Dig in.

Common Mistakes to Avoid
- The Overzealous Microwave: This is the biggest pitfall. Microwave wattages vary wildly. When in doubt, undercook. You can add 10-second bursts; you can’t un-make a tough, dry puck.
- Skipping the “Buttermilk” Step: Just adding plain milk misses the classic red velvet tang. The acid is crucial for texture and flavor. Don’t cut this corner.
- Using a Tiny, Cute Mug: If your batter fills the mug more than halfway, you’re risking a volcanic overflow. Big mugs are your friend. Give the cake room to rise.
- Over-Stirring the Batter: Stir until you no longer see dry flour streaks. Then STOP. Overworking the gluten is what leads to a rubbery, dense cake.
Alternatives & Substitutions
- Dairy-Free? Easy. Use your favorite plant-based milk (oat or soy work great) with the vinegar. Use oil, not butter.
- No Food Coloring? You’ll have a “Blush Velvet” or “Cocoa Velvet” cake. It tastes identical, just lacks the dramatic flair. For a natural option, beet powder works but adds an earthy flavor. IMO, it’s not worth it for a 2-minute cake.
- Out of Cocoa? Then you’re making a vanilla cake, my friend. Replace the cocoa with an equal amount of flour and add a few drops more vanilla.
- Want a Glaze Instead? Mix 3 tbsp powdered sugar with 1-2 tsp milk or cream until drizzle-able. Simpler, but still delicious.
FAQ (Frequently Asked Questions)
- Can I make one big cake in a single mug? I don’t recommend it. The center will stay raw while the edges overcook. Two separate mugs guarantee perfect texture in each.
- Why is my cake gummy/wet in the middle? You either undercooked it (add 10-second bursts) or overmixed the batter (be gentler next time).
- Can I bake this in a real oven? You can! Preheat to 350°F and bake in oven-safe ramekins for 14-18 minutes. It’s good, but the whole “instant gratification” thing is kinda the point here.
- Does the vinegar make it taste weird? Not at all. It reacts with the baking powder and “buttermilk” for lift and flavor. You won’t taste “vinegar,” you’ll taste “red velvet.”
- Can I prep dry mixes in advance? 100%. Mix multiples of the dry ingredients in little baggies or jars. Label them. When the craving hits, just add the wet stuff. You’re a meal-prep genius.
- My food coloring stained the mug! A paste of baking soda and dish soap usually works. For next time, gel food coloring stains less than liquid.
🔥 Recommended Valentine’s Movie Night Kitchen Essentials
Here are a few of my favorite must-have products that make Valentine’s recipe ideas for family movie night easier, more fun, and extra cozy for everyone.
Electric Popcorn Maker
Make fresh, theater-style popcorn at home in minutes — perfect for sweet or savory Valentine’s popcorn bowls the whole family will love.
👉 Check it out on Amazon
Swissmar Peak 10-Piece Cast Iron Fondue Set
Ideal for chocolate fondue with fruit, marshmallows, and cookies — a fun, interactive dessert that feels special without being complicated.
👉 See today’s price on Amazon
Swissmar Sierra 11-Piece Cast Iron Fondue Set
A stylish fondue set for both sweet and savory dipping, perfect for sharing during a cozy family movie night or romantic Valentine’s dessert.
👉 View it on Amazon
Tefal Electric Fondue Maker
Easy temperature control makes melting chocolate or cheese effortless — great for family-friendly Valentine’s treats with zero guesswork.
👉 Grab it on Amazon
Sensio Home Waffle Maker + Popcorn + Chocolate Fountain Bundle
The ultimate movie night combo — make heart-shaped waffles, fresh popcorn, and chocolate-dipped treats all in one fun bundle.
👉 Get it on Amazon
Disclosure: As an Amazon Associate, I earn from qualifying purchases. This means if you click on one of the product links and make a purchase, I may receive a small commission at no extra cost to you. I only recommend products I genuinely believe add value to family-friendly moments and special occasions.

Final Thoughts
And there you have it. Your secret weapon against late-night cravings and last-minute “I need something sweet” moments has been officially unlocked. This recipe is about joy, not perfection. It’s about treating yourself with minimal fuss and maximum reward. So go ahead, make the cake, take the victory lap, and savor every single spoonful. You’ve earned it.