
10 Easy Valentine’s Day Nail Art Ideas Anyone Can Try (Seriously!)
You want festive nails for Valentine’s Day. You’ve seen those intricate, glittery masterpieces on social media and thought, “I could never do that.” Your nail art history might be a sad story of shaky lines, polish floods, and giving up in frustration. What if you could create adorable, holiday-perfect nails without needing the steady hands of a surgeon or a drawer full of special tools?
The secret? Keeping it simple. You don’t need to be a pro to have pretty nails. You just need clever, easy-to-execute ideas. That’s why we’ve rounded up 10 easy Valentine’s Day nail art ideas anyone can try. These designs use basic tools you probably already own (or can grab for cheap) and focus on techniques that are forgiving and fun. Whether you have 5 minutes or an hour, there’s a cute look here for you. Let’s turn your fingertips into a sweet celebration.
Your Mini Toolkit: What You Really Need
Before we start, let’s demystify the tools. You don’t need a full salon kit.
The Bare Essentials:
- Base Coat & Top Coat: Non-negotiables for protecting your nails and making your art last.
- 2-3 Polish Colors: Think: a white or nude, a classic red, a pink, and maybe a glitter.
- A Dotting Tool: This is the MVP. No need to buy one—use the rounded end of a bobby pin, a toothpick, or even a ballpoint pen that’s run out of ink.
- Scotch Tape or Nail Vinyls: For crisp lines.
- A Small Makeup Brush or Old Eyeliner Brush: For cleanup.
Pro-Tip for Beginners: Thin your polish by rolling the bottle between your palms instead of shaking it. Shaking creates bubbles that can ruin your design. And always let each layer dry completely before moving to the next step. Patience is your best tool!
The 10 Easy, Doable Designs
Here are the ideas, ranked from “super speedy” to “a little more time but totally worth it.”
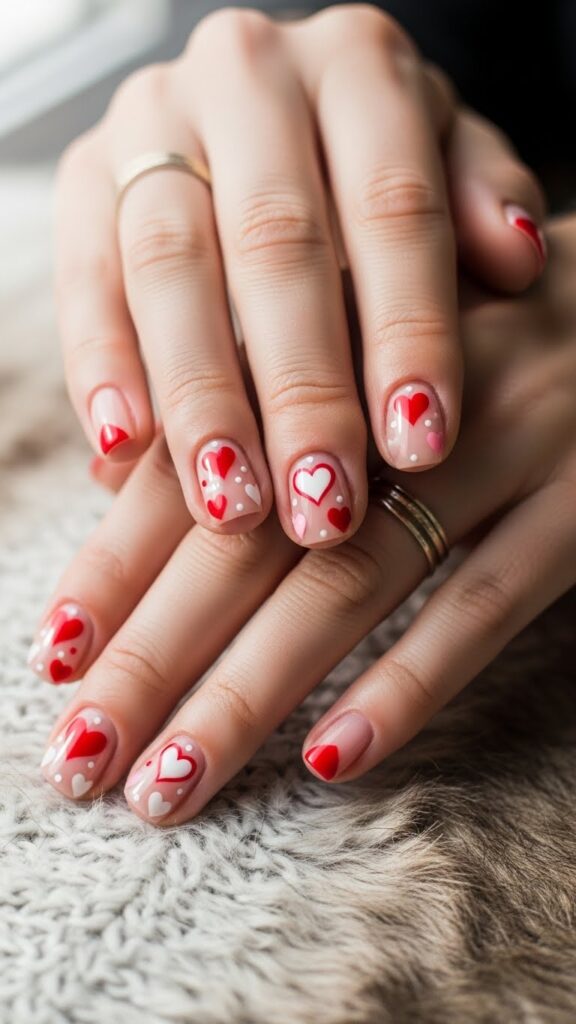
1. The Classic Love Dots
Why it’s easy: If you can poke your nail with a dotting tool, you can do this.
- Steps: Paint all nails a solid color (nude, pink, or red). Let dry completely. Dip your dotting tool in white polish and create two dots side-by-side on each nail. Before they dry, use a contrasting color (red on white, or white on red) to make a tiny downward-facing “V” dot between them to form a heart.
- Secret: If the heart shape feels tricky, just do random polka dots in red, pink, and white. Still super cute!
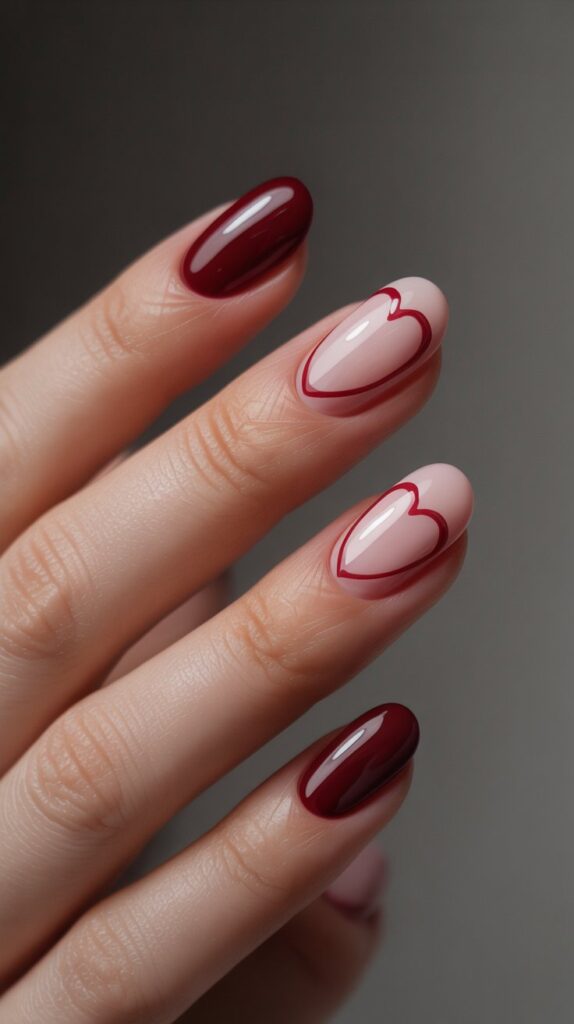
2. The Crisp Negative Space Heart
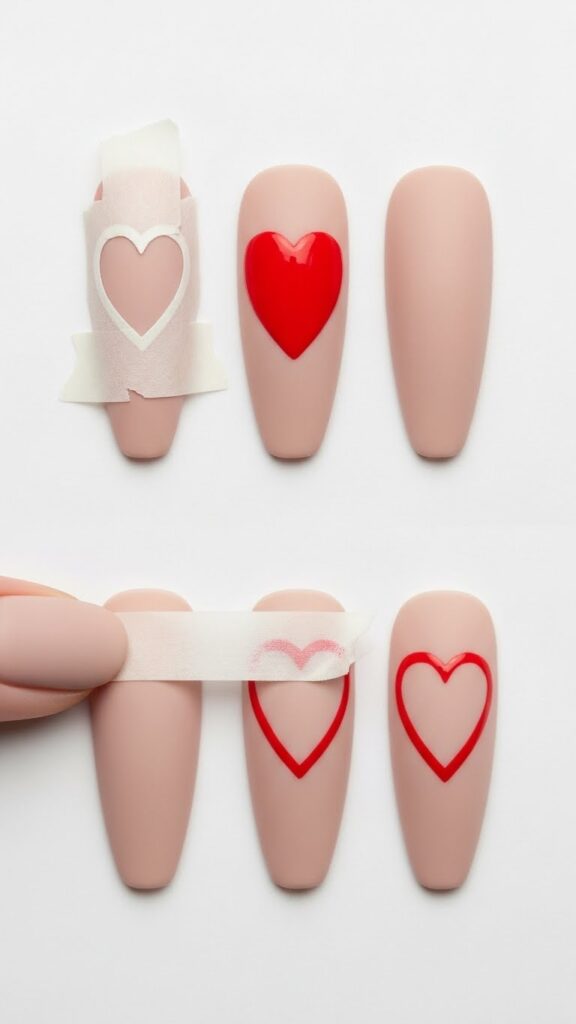
Why it’s easy: Tape does all the hard work for you.
- Steps: Cut a small triangle out of the sticky edge of scotch tape. Stick the tape triangle to your nail (the point facing your cuticle) to create a heart-shaped shield. Paint over your entire nail with your chosen color. Carefully peel the tape off while the polish is still wet to reveal a perfect, clean heart.
- Secret: Use a tweezers to handle the tiny tape piece. Stick it to your skin first to make it a little less sticky so it doesn’t rip up your base coat.
3. Glitter Gradient Tips

Why it’s easy: It’s messy in the best way—no precision needed.
- Steps: Paint nails with a sheer nude or soft pink. Let dry. Pour a little glitter polish onto a piece of foil. Use a makeup sponge to dab into the glitter and then gently pat it onto just the tips of your nails, building up the intensity. The sponge creates a soft, blended gradient.
- Secret: This hides grown-out nails beautifully and looks professional with zero skill.
4. Sweet & Simple Line Art
Why it’s easy: Straight lines are easier than you think with a guide.
- Steps: Paint nails white. Let dry completely. Use thin striping tape or scotch tape to create a vertical line down the center of the nail. Paint one side red. Carefully remove the tape. On the other side, use your dotting tool to add a few tiny pink dots.
- Secret: If you don’t have tape, use a thin brush or even a nail art pen. Wobbly lines just look artistic!
5. Adorable XOXO Accent
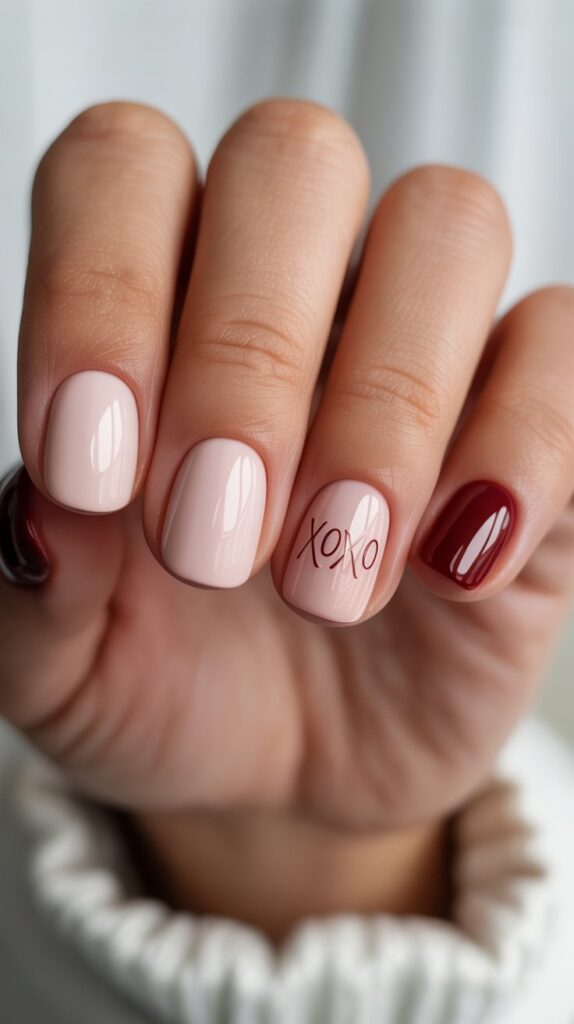
Why it’s easy: Only one nail requires “art.”
- Steps: Paint all but your ring finger a solid, creamy color. On your ring finger, paint a contrasting base. Using a toothpick or detail brush, carefully draw a small “X” and an “O” next to each other. Top with a glossy top coat.
- Secret: Practice the X and O on a piece of paper first. If you mess up, just wipe it off with polish remover and a brush and try again on the still-wet polish.
6. Ombre Hearts with a Sponge
Why it’s easy: The sponge technique is forgiving and creates a gorgeous effect.
- Steps: Paint your nails white. On a makeup sponge, paint stripes of red and pink polish next to each other. Dab the sponge lightly onto your nail. It will transfer a blended, marbled mix of color. Once dry, use a small brush or a toothpick dipped in white polish to draw a simple heart outline on one or two nails.
- Secret: You can skip the heart drawing and the ombre alone looks incredible.
7. French Tips with a Twist

Why it’s easy: A new take on a classic you already know.
- Steps: Do a classic French manicure (sheer base with white tips). Instead of a white smile line, use red or pink. Then, take your dotting tool and add a single tiny heart at the base of the smile line on each nail.
- Secret: Use guides for the French tip if you need to, or just go freehand for a softer look.
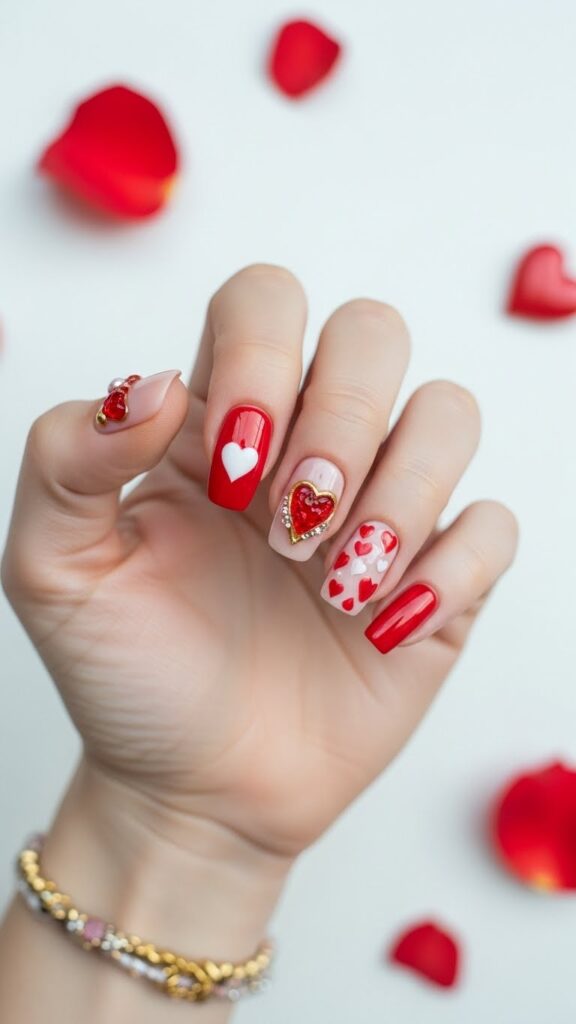
8. Confetti Party Nails
Why it’s easy: It’s literally just dots and glitter.
- Steps: Paint nails a dark base like navy, black, or deep red. Let dry. Using your dotting tool in various sizes, cover your nails in random dots of white, pink, red, and silver. Finish with a glitter top coat sprinkled with tiny heart glitter if you have it.
- Secret: There’s no pattern to follow. The more random, the better it looks!
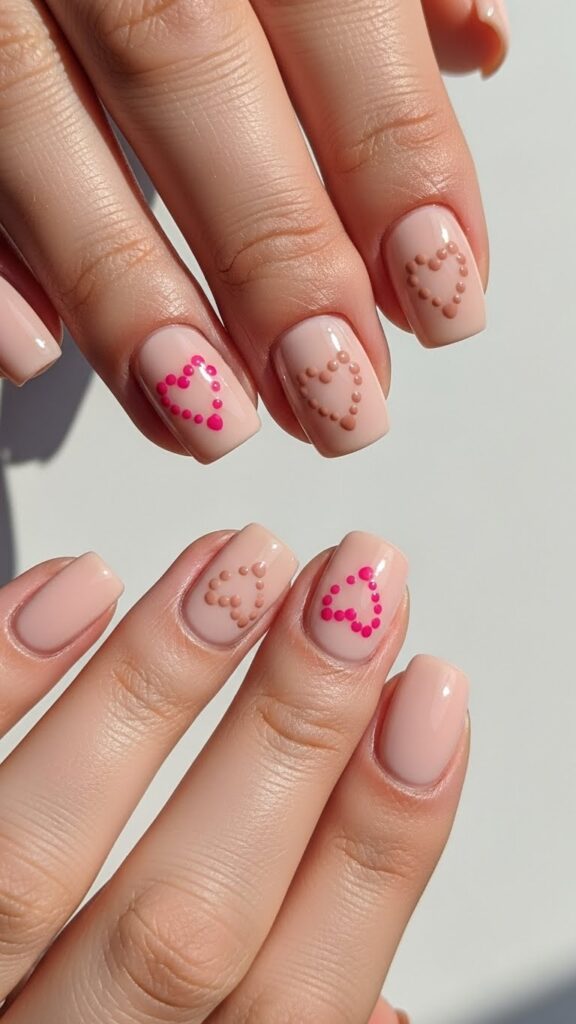
9. Velvet Matte Hearts
Why it’s easy: The matte top coat makes everything look chic, even simple shapes.
- Steps: Paint nails two coats of a rich, cream color (like a classic red or hot pink). Let dry completely. Use a small brush or a toothpick to draw a few small heart outlines in a contrasting glossy polish (white on red, black on pink). Immediately after, cover the entire nail with a matte top coat. The hearts will stay glossy, popping against the velvety matte background.
- Secret: The matte finish hides minor imperfections like brush strokes.
10. “Love” Letter Mani
Why it’s easy: It’s just dots and lines.
- Steps: Paint nails a light, neutral color. On your accent nail (usually the ring finger), use a thin brush or a toothpick to write a tiny, scribbly “L”, “O”, “V”, “E” across four nails, or just “XO” on one. On the other nails, use your dotting tool to make a simple line of three tiny dots (like a minimalist ellipsis…).
- Secret: Your handwriting doesn’t need to be perfect. A whimsical, scribbled look is part of the charm.
🔥 Recommended Valentine’s Day Nail Art Essentials
Here are a few of my favorite Valentine’s Day nail art essentials that make creating cute, romantic (and Pinterest-worthy!) nail designs easier, faster, and way more fun — even if you’re a total beginner. 💅❤️1. Valentine’s Day Nail Art Stickers (Hearts, Love & Minimal Designs)
An easy, no-skill way to get perfect heart designs every time. These self-adhesive stickers are great for minimalist nails, accent fingers, or quick Valentine manicures.
👉 Check it out on Amazon2. Valentine’s Nail Art Stickers – Roses, Bows & Romantic Icons
A fun mix of romantic elements like roses, hearts, and love symbols. Ideal for readers who want cute Valentine nails without freehand painting.
👉 See today’s price on Amazon3. Beetles Valentine Gel Nail Polish Set (Reds, Pinks & Neutrals)
A versatile gel polish set featuring classic Valentine shades. Perfect for minimalist heart designs, French tips, or soft romantic looks.
👉 Grab it on Amazon4. Nail Art Brushes & Dotting Tool Set
This tool kit makes tiny hearts, dots, and fine lines much easier — even for beginners. A must-have for DIY Valentine nail art tutorials.
👉 View it on Amazon5. Valentine’s Nail Art Accessories Bundle (Stickers + Decorations)
A complete mix-and-match kit with heart decals, glitter accents, and romantic nail decorations. Great for creative readers who love experimenting.
👉 Get it on AmazonDisclosure:
As an Amazon Associate, I earn from qualifying purchases. This means if you click on one of the product links and make a purchase, I may receive a small commission at no extra cost to you. I only recommend products that are popular, well-reviewed, and genuinely useful for creating beautiful Valentine’s Day nail art.
Beginner’s Corner: Fixes for Common Oops Moments

- Flooded Cuticles? Wait for the polish to dry completely, then take a small brush dipped in remover and clean up the skin around your nail.
- Smudged Design? If you smudge it while wet, gently wipe it off and start that nail over. If it’s dry and you smudge the top coat, add another thick layer of top coat—it can sometimes re-melt the layers underneath and smooth it out.
- Shaky Hands? Rest your painting hand on a table. Plant your pinky finger of your painting hand on the hand you’re painting for stability.
FAQ: Your Nail Art Questions, Answered
Q: How do I make my DIY manicure last longer?
A: Prep is key! Push back cuticles, lightly buff the nail surface, and always use a dehydrator or rubbing alcohol on the nail before your base coat to remove oils. Cap the free edge of your nail with every layer (base, color, top).
Q: I’m really bad at using my non-dominant hand. Help!
A: You’re not alone! Do the intricate art only on your dominant hand. For your other hand, stick to simple designs that are hard to mess up: solid colors with a glitter accent nail, ombre sponging, or simple dots.
Q: What’s the best fast-drying top coat?
A: A good quick-dry top coat is a game-changer. It seals your design and dries it to the touch in minutes, preventing smudges.
(I’ve tested dozens; here’s the affordable, drugstore top coat that performs like a dream.)
Q: Can I do these on short nails?
A: Absolutely! In fact, simpler designs like dots, negative space, and French tips often look even more chic on shorter, neat nails.
Q: How do I remove glitter polish easily?
A: The “foil method” is your friend. Soak a cotton pad in remover, place it on your nail, and wrap the tip in aluminum foil for 5 minutes. It slides right off.
Conclusion: Your Nails, Your Valentine’s Vibe
These 10 easy Valentine’s Day nail art ideas anyone can try are here to prove that a festive manicure is within your reach. The goal isn’t perfection—it’s expression and a bit of fun. By starting with simple tools like dotting tools and tape, and choosing forgiving designs like gradients and glitter, you can create something beautiful that makes you smile. Remember, every pro started as a beginner who decided to give it a try.
You now have a toolkit of ideas, fixes, and the confidence to create a sweet, personal look for Valentine’s Day. So, clear a space at your table, put on a good playlist, and enjoy the process.

