So, you want to feel fancy and bake something, but the thought of creaming butter and sugar gives you anxiety?
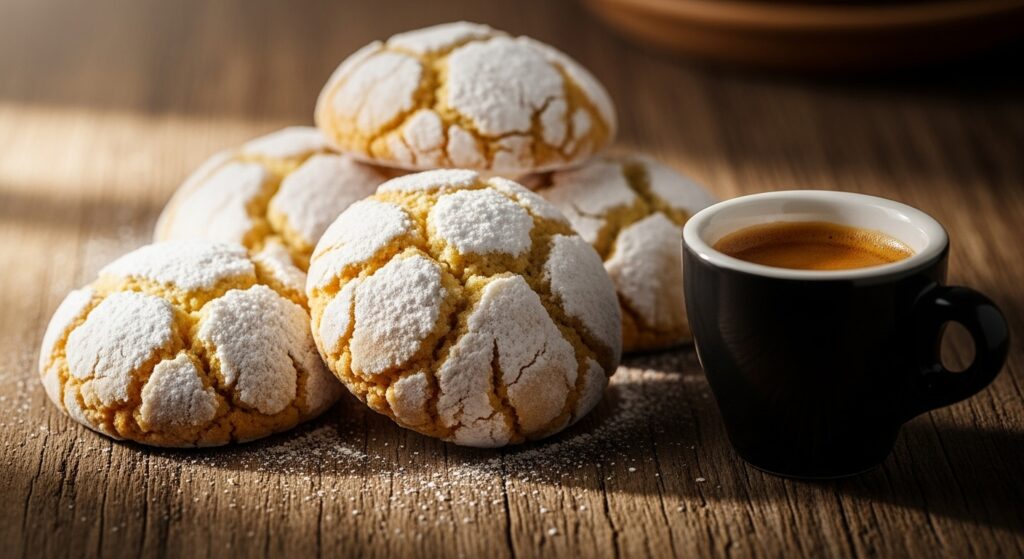
Same. You’re craving that feeling of accomplishment without the multi-day project and a sink full of every bowl you own. Enter the Italian Ricciarelli. Think of them as the almond cookie’s elegant, gluten-free, and surprisingly simple cousin who shows up looking effortlessly chic while you’re still in your sweatpants. They’re soft, chewy, delicately sweet, and look like you spent years training in a Tuscan bakery. Your secret is safe with me.
Why This Recipe is Awesome
Let’s cut to the chase. This recipe is basically idiot-proof. I’m not kidding. There’s no butter to cream, no mysterious baking techniques, and the dough is about as forgiving as it gets. You get to play with edible dough like it’s Play-Doh, but you can eat the results without that weird, salty aftertaste.
Plus, they’re naturally gluten-free, so you can casually drop that into conversation when you serve them. “Oh, these? Just some ricciarelli I whipped up. Gluten-free, of course.” Cue the impressed nods. They’re the perfect cookie to impress your mother-in-law, your foodie friend, or just your future self who deserves a damn good cookie with their afternoon coffee.
Ingredients You’ll Need
Gather your squad. This isn’t a complicated cast of characters.
- 2 cups (200g) Almond Flour: Not almond meal. We want that fine, powdery stuff for a smooth, non-gritty cookie. This is the star of the show, so don’t cheap out.
- 1 cup (100g) Powdered Sugar: Plus another ½ cup or so for rolling. This is for that melt-in-your-mouth texture, not for a dentist’s nightmare.
- 2 Egg Whites: Just the whites! From large eggs. This is our glue. No yolks allowed—they make the cookies cakey, and we’re not making cake.
- 1 tsp Almond Extract: For a powerful punch of “Yep, that’s an almond cookie.”
- 1 tsp Orange Zest: The secret weapon. It cuts the sweetness and makes everything taste… brighter. Trust me.
- A Pinch of Salt: To make all the flavors pop. Don’t skip it.
- ½ tsp Baking Powder: For a little lift.
- Optional: ½ tsp Vanilla Extract: For a little extra depth. Nice, but not essential.
Step-by-Step Instructions
- Prep Your Stage. Preheat your oven to 300°F (150°C). Line a baking sheet with parchment paper. Preheating is non-negotiable. We’re not throwing these delicate beauties into a cold abyss.
- The Dry Team Huddle. In a medium bowl, whisk together the almond flour, 1 cup of powdered sugar, baking powder, and that all-important pinch of salt. Make sure it’s all one happy, uniform mixture.
- The Wet Work. In a separate, spotlessly clean bowl, beat the egg whites with a hand mixer (or a whisk and some serious elbow grease) until they form soft peaks. This means when you lift the beaters out, the peaks flop over just a little. We’re not making meringue for a pavlova, so no need for stiff peaks.
- The Grand Union. Gently fold the beaten egg whites, almond extract, vanilla (if using), and orange zest into the dry ingredients. Use a spatula and a light hand. Mix until just combined. You’re not trying to win a mixing competition; overmixing is the enemy of chewy.
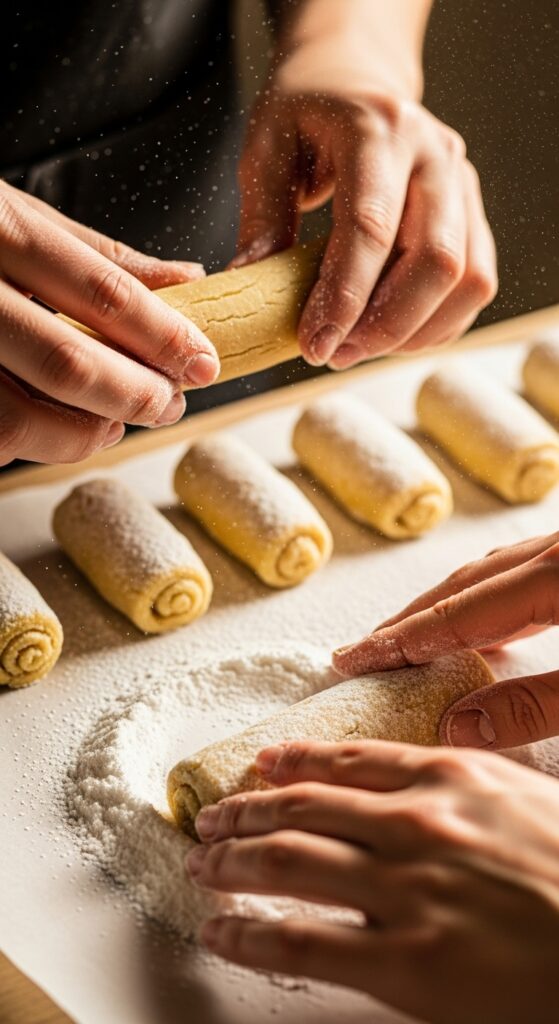
- Shape & Sugar Coat. Pour that extra ½ cup of powdered sugar into a shallow bowl. Now, this dough will be sticky. That’s normal! It’s supposed to be. Wet your hands slightly to prevent a sticky situation. Take a tablespoon-sized chunk of dough, roll it into a rough log shape, and dredge it heavily in the powdered sugar. Place it on your prepared baking sheet and gently press it down to flatten slightly. Repeat, giving them some space to breathe.
- The Waiting Game. Let the cookies rest on the baking sheet for about 15-20 minutes before baking. This helps them form a skin, which gives them that classic cracked top. Go check your Instagram, I’ll wait.
- Bake to Perfection. Bake for 15-20 minutes. They should be set but still pale. You’re looking for a soft cookie, not a tan. The bottoms might get a hint of color, but the tops should remain mostly white.
- Cool & Conquer. Let them cool on the baking sheet for 10 minutes before transferring them to a wire rack. They’ll be fragile when hot, so be patient. This is the hardest part.
Common Mistakes to Avoid
- Using Almond Meal: This will give you a gritty, coarse cookie. Almond flour is fine and powdery. It makes all the difference.
- Skipping the Resting Time: If you don’t let them sit before baking, you won’t get that lovely, classic cracked top. Patience, young grasshopper.
- Over-baking: These are not crunchy biscotti! The second you see them turning golden on top, you’ve gone too far. They should be soft and chewy.
- Mixing with a Heavy Hand: Folding, not beating. We want to keep as much air in those egg whites as possible for a light texture.
Alternatives & Substitutions
Don’t have something? Let’s get creative.
- No Orange Zest? Lemon zest is a fantastic substitute. Or, you can skip it, but you’ll lose that little zing.
- Want a Different Flavor? Swap the almond extract for ½ a teaspoon of orange blossom water or rose water for a truly authentic, floral Italian touch.
- Need it Nut-Free? Sorry, friend. The almond is the whole point. This recipe cannot be made nut-free. Maybe make a shortbread instead?
- Egg-Free? I haven’t tested it, but a flax “egg” white substitute might work for binding, though the texture will be different. It’s an experiment for a brave soul.
FAQ (Frequently Asked Questions)
- Can I use whole almonds and grind them myself? You can, but you have to be incredibly careful not to turn them into almond butter. And you’ll still need to mix them with powdered sugar to prevent oiliness. IMO, save yourself the hassle and buy the flour.
- My dough is SO sticky. Did I mess up? Nope! It’s supposed to be. This is why we wet our hands. A little sticky dough leads to a wonderfully soft and chewy cookie.
- Why are my cookies flat? Did you remember the baking powder? Was your egg white beaten enough? These are the usual suspects.
- Can I double the recipe? Absolutely. Go for it. Just make sure your mixing bowl is big enough to handle the party.
- How do I store these beauties? In an airtight container at room temperature. They actually get better and chewier after a day! They’ll keep for about a week… if they last that long.
- Can I freeze them? Yes! Freeze the baked and cooled cookies in a single layer on a tray, then transfer to a freezer bag. Thaw at room temperature.
🎁 Recommended Holiday Kitchen Essentials
🍳 Here Are a Few of My Favorite Holiday Kitchen Essentials — Tools That Make Christmas Cooking Easier, Faster, and Way More Fun (From Baking Cookies to Preparing Cozy Casseroles and Festive Drinks!)
- Crock-Pot 8-Quart Programmable Slow Cooker
Perfect for big families or meal prepping — set it, forget it, and come home to tender, juicy meals every time.
👉 Check it out on Amazon - Christmas Cookie Cutter Set
Bake adorable festive cookies that everyone will love.
👉 Get yours now on Amazon - Stand Mixer (5–6 Quart)
Makes mixing doughs and batters effortless during holiday baking.
👉 Grab it here on Amazon - Glass Punch Bowl Set
Serve Christmas drinks and punches beautifully.
👉 Shop now on Amazon - Ceramic Baking Dish Set
Ideal for creamy casseroles and sweet desserts — oven to table in style.
👉 View it on Amazon
Disclosure: As an Amazon Associate, I may earn a small commission from qualifying purchases at no extra cost to you. I only recommend products I personally love and use for my own recipes.

Final Thoughts
And there you have it. You’ve just made a cookie that looks and tastes like it came from a fancy European patisserie, all without breaking a sweat. You’re officially a rock star in the kitchen. Now, go pour yourself a strong espresso, plop a ricciarelli on the saucer, and bask in the glory. You’ve earned it.