Is your couch feeling a little too comfortable, but the thought of baking makes you want to crawl back under the blanket? I get it. You want the glory of a homemade, buttery biscuit without the hassle of a recipe that requires a PhD in Kitchen Science. What if I told you the fluffiest, most satisfying biscuits of your life are hiding in just three ingredients? Stop raising your eyebrows and start preheating the oven. This is about to change your lazy-day game.
Why This Recipe is Awesome
Let’s be real, this recipe is basically a culinary cheat code. It’s:
- The Ultimate Shortcut: We’re bypassing all the nonsense. No yeast, no waiting for hours, no fancy equipment. It’s the express lane to Carb Town.
- Impressively Low-Effort: The cleanup is almost as easy as the baking. One bowl, one baking sheet, and you’re basically a professional pastry chef now.
- Weirdly Forgiving: Even if your “kneading” technique is more “desperate patting,” these biscuits are hard to ruin. They’re resilient little clouds of joy.
- Your Secret Weapon: Serve these at a brunch and casually drop the “three ingredient” bomb. Watch as people look at you with a mix of awe and suspicion. Let them wonder.
Ingredients You’ll Need
Gather your tiny, mighty army. That’s it. No, seriously, look again. That’s all.
- 2 cups Self-Rising Flour (plus extra for dusting): This is the magic dust. It already has the leavening (baking powder) and salt built-in. If you try to use all-purpose flour here, you will be deeply disappointed, and we will have a moment of silence for your flat, sad biscuits.
- 1 cup Heavy Cream (or Whipping Cream): This is the double agent—it’s both the fat and the liquid. Its high fat content is what creates that irresistible, tender crumb. Don’t even think about using milk. We’re not making health food; we’re making memories.
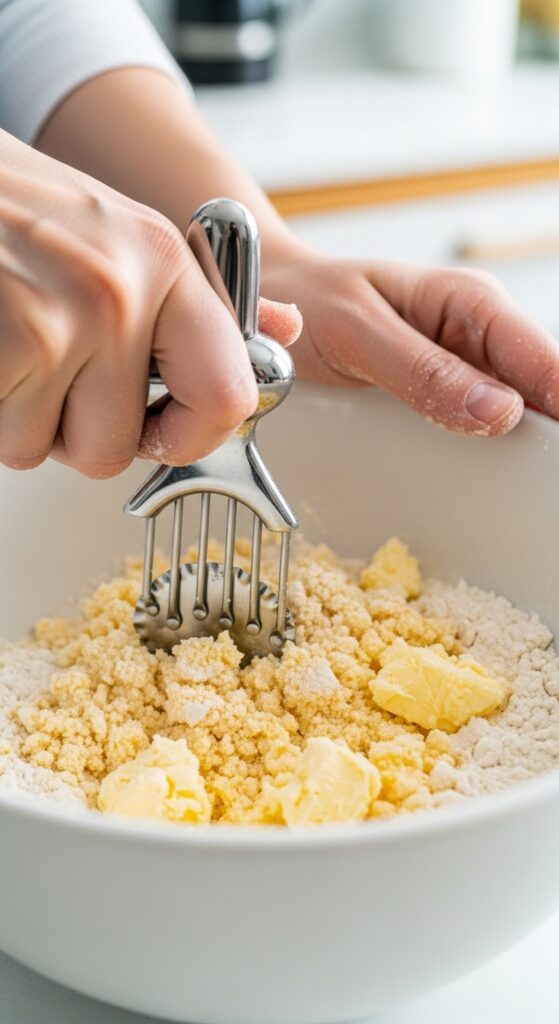
- ½ cup (1 stick) Cold Salted Butter: I need you to internalize this: COLD. BUTTER. We’re not talking “cool.” We’re talking “I just pulled this from the back of the fridge where the milk freezes” cold. This is the secret to flaky layers.
Step-by-Step Instructions
Ready for the marathon? Don’t worry, it’s more of a brisk walk.
- Heat Things Up. Fire up your oven to a blazing 450°F (230°C). No skipping this! While it’s warming up, line a baking sheet with parchment paper. This is your one concession to “fancy baking.”
- Create a Buttery Mess. In a medium bowl, add your self-rising flour. Take your ice-cold butter and cut it into tiny little cubes. Toss them into the flour. Now, using a pastry blender, two forks, or your impeccably clean fingers, work the butter into the flour until it looks like a coarse, crumbly meal with a few pea-sized butter bits remaining. Those butter bits are your golden ticket to flakiness.
- Bring It All Together. Pour the heavy cream into the bowl. Grab a fork and stir gently. Stop the very second a shaggy, slightly sticky dough forms. Do NOT go for a smooth, perfect ball. Overmixing is the enemy of fluffy biscuits.
- Shape with Confidence. Dump the dough onto a lightly floured surface. Gently pat it into a 1-inch thick rectangle. Fold it in half, and then pat it down again. Repeat this fold once more—this builds layers! Finally, pat it out to about ¾-inch thickness. Use a glass, a biscuit cutter, or a knife to cut out your biscuits. Press straight down. No twisting! Twisting seals the edges and stifles their ambition to rise.
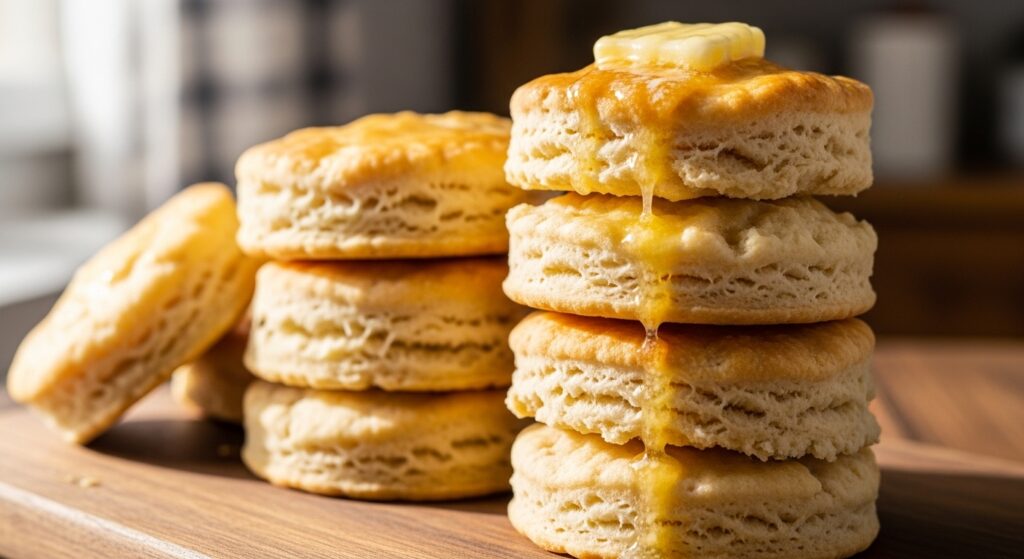
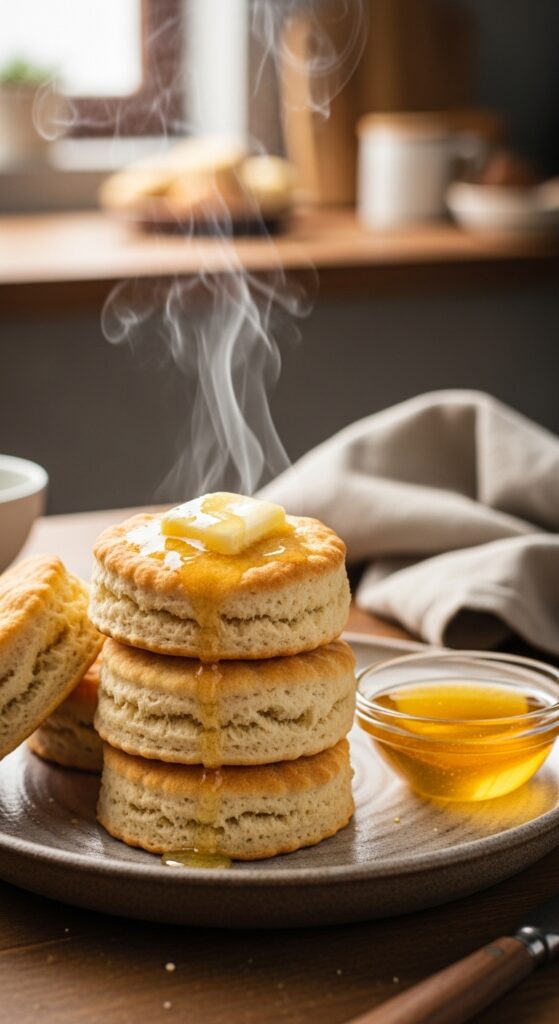
- Bake to Golden Glory. Place the biscuits on your prepared baking sheet, their sides just touching. This cozy arrangement helps them climb upwards together. Bake for 10-12 minutes, until they’re puffed up and gloriously golden on top.
Common Mistakes to Avoid
Learn from my (hypothetical) errors. You’re welcome.
- Warm Butter Syndrome: If your butter melts before it hits the oven, it can’t create steam pockets. No steam pockets = no flaky layers. Keep that butter frigid.
- The Overmixer’s Curse: You are not kneading bread. You are just gently convincing the ingredients to hold hands. The more you mix, the tougher they get. Walk away from the bowl!
- The Twister: I already said it, but it’s so important it bears repeating. Twisting the cutter = sealed edges = stunted biscuits. Be decisive. Press down and lift up.
- The Impatience Tax: Not preheating your oven is like starting a road trip on an empty tank. That initial blast of heat is crucial for the rise. Let the oven get properly hot.
Alternatives & Substitutions
Feeling adventurous? Or just out of an ingredient? Here’s your playbook.
- No Self-Rising Flour? No panic. For every 1 cup of all-purpose flour, add 1 ½ teaspoons of baking powder and ¼ teaspoon of salt. Whisk it together really well before you add the butter.
- Out of Heavy Cream? Full-fat, plain Greek yogurt or buttermilk can work in a pinch. The texture will be a bit more tangy and dense, but still totally edible.
- Wanna Get Fancy? Once you master the basic recipe, fold in a handful of shredded cheddar cheese and some chopped herbs. Or add a tablespoon of sugar and some lemon zest for a shortcake vibe. The world is your biscuit oyster.
FAQ (Frequently Asked Questions)
- “Can I use margarine?” Technically, the science would work. But why would you create a beautiful, flaky masterpiece and then give it the soul of a margarine? Just use the butter.
- “My dough is a sticky disaster!” Don’t fret! Just add a light sprinkle of flour to your hands and the work surface. A little sticky is normal; a lot of sticky is an easy fix.
- “Can I make the dough ahead of time?” You can mix the dry ingredients and cut in the butter ahead of time and keep it in the fridge. But for the best rise, add the cream and bake them fresh. They are a “right now” kind of food.
- “Why are my biscuits dense?” Let’s play detective. Old self-rising flour? Overmixed dough? Warm butter? We’ll crack the case next time, I promise.
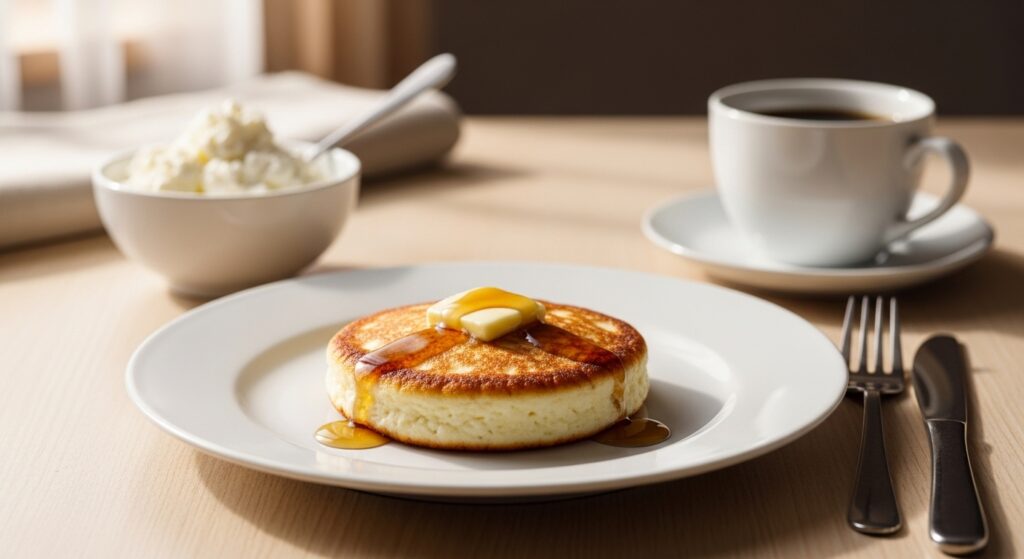
- “What’s the best way to eat these?” Is this a trick question? Slathered in butter and honey, smothered in sausage gravy, or used to sop up the last bits of soup from a bowl. There is no wrong way.
🔥 Recommended Baking & Kitchen Essentials
Here are a few of my favorite tools that make baking (and biscuit-making!) easier, faster, and way more fun.
1. BLACK+DECKER Crisp ’N Bake Air Fry Toaster Oven
Crisps, toasts, bakes, and air fries — all in one compact countertop oven. Perfect for quick biscuits, snacks, and weeknight cooking.
👉 Check it out on Amazon
2. CHEFMAN Digital Air Fryer + Rotisserie (XL 10L)
A true all-in-one appliance — air fry, roast, bake, dehydrate, and rotisserie family-size meals with ease.
👉 See today’s price on Amazon
3. 5-Piece Pastry & Biscuit Cutter Set
Everything you need for perfect biscuits: stainless-steel cutters, dough scraper, pastry blender, and a baking mat — beginner friendly and super durable.
👉 Grab it on Amazon
4. Nordic Ware Naturals Aluminum Half Sheet Pans (2-Pack)
Professional-quality sheet pans that brown beautifully, never warp, and last a lifetime — essential for any baking lover.
👉 View it on Amazon
5. Amazon Basics Nonstick 12-Cup Muffin Pans (Set of 2)
Reliable nonstick pans for muffins, cupcakes, egg bites, and more — even heating, easy cleanup, and great value.
👉 Get it on Amazon
Disclosure:
As an Amazon Associate, I earn from qualifying purchases. This means if you click on one of the product links and make a purchase, I may receive a small commission at no extra cost to you. I only recommend products I personally use and love.
Final Thoughts
And just like that, you’ve done it. You’ve transformed three simple things into a plate of pure, golden happiness. You didn’t need a complicated recipe or a ton of time. You just needed a little nudge and the promise of something delicious.
Now go forth and enjoy the fruits of your (minimal) labor. You’ve earned every buttery, flaky, glorious bite.